


These chocolate cookies made with the Thermomix® get their depth not from one source of chocolate, but from two. 200 g of dark couverture goes into the dough melted, alongside 80 g of unsweetened cocoa powder added dry. The couverture contributes fat, shine and a melting sweetness. The cocoa powder turns the dough almost black and gives it that sharp, slightly earthy bitter note that couverture alone never achieves.
We have been baking these cookies during Advent for years, usually on the first or second weekend when the biscuit tins need filling. With the double layer of melted chocolate and cocoa powder, they taste like a proper chocolate cookie, not like a sweet chocolate flavouring. Three things need to be done in the right order, and then the dough comes together.
Chocolate Cookies with the Thermomix®
Ingredients 0 / 12 ✓
- 100 g sugar
- 200 g dark couverture chocolate
- 170 g brown sugar
- 1 tbsp vanilla sugar
- 1 pinch salt
- 2 eggs
- 100 g milk
- 100 g butter softened
- 120 g flour
- 80 g unsweetened cocoa powder
- 1/2 tsp ground cinnamon
- 1 sachet baking powder
Instructions 0 / 6
-
1
Pulverise the sugar.
Add the sugar to the mixing bowl and pulverise for 10 seconds / speed 10, then set aside.
-
2
Chop and melt the chocolate.
Break the chocolate into pieces, add to the mixing bowl and chop for 10 seconds / speed 7, push down with the spatula, then melt for 2 minutes / 50°C / speed 2.
-
3
Mix the dough.
Add the brown sugar, vanilla sugar, salt, eggs, milk, butter in pieces, flour, cocoa powder, cinnamon and baking powder to the mixing bowl and mix for 40 seconds / speed 5.
-
4
Preheat the oven.
Preheat the oven to 180°C top and bottom heat and line a baking tray with baking paper.
-
5
Shape the cookies.
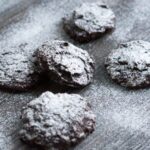
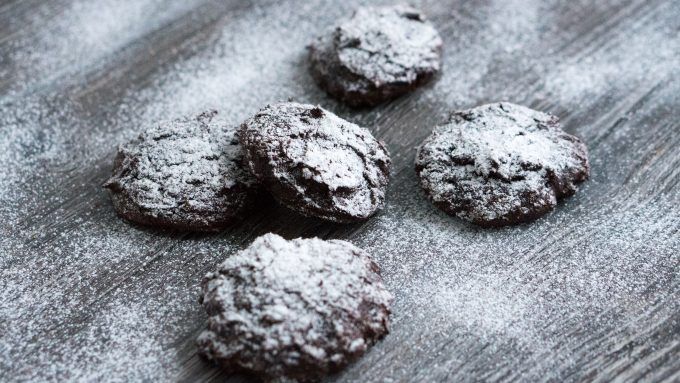
Using two small teaspoons, place walnut-sized mounds on the baking tray with a gap of about 2 cm between each one, then dust lightly with icing sugar.
-
6
Bake the cookies.
Bake the cookies on the middle shelf for 12 to 15 minutes, dust with the remaining icing sugar and leave to cool.
Tip: Love almonds? Add chopped almonds to the dough in step 3.
Video
Nutrition per serving
Why the order of steps in the mixing bowl matters
Pulverise the sugar first. The 100 g of sugar runs for 10 seconds at speed 10. Not because the recipe fails without icing sugar, but because pulverised sugar distributes evenly through a fat-rich dough. Granulated sugar stays behind as small crystals even after mixing, and those crunch when baked. We transfer it out after pulverising and wait briefly, otherwise the mixing bowl clouds when you open it.
Chop the couverture first, then melt it, all in the bowl. We break the 200 g of dark couverture roughly into the mixing bowl, chop for 10 seconds at speed 7, push down with the spatula, then gently melt for 2 minutes at 50°C on speed 2. 50°C is the threshold at which cocoa butter softens without the chocolate turning grainy or losing its gloss. Melting the chocolate at 60 or 70°C risks a dull, sandy texture in the dough.
Everything else goes in in one go. 170 g brown sugar, 1 tbsp vanilla sugar, 1 pinch of salt, 2 eggs, 100 g milk, 100 g softened butter in pieces, 120 g flour, 80 g cocoa powder, half a teaspoon of ground cinnamon and a sachet of baking powder all go into the mixing bowl with the melted chocolate. 40 seconds at speed 5 is enough for a smooth dough. Running it longer does nothing: the dough does not become firmer with more mixing time, it just gets warm.
Brown sugar is not interchangeable
The ratio of 170 g brown sugar to 100 g white sugar is deliberate. Brown sugar contains residual molasses, which does two things: it retains moisture in the cookie, and it contributes a caramel background note that bridges the chocolate and vanilla. If you replace both sugars with plain white sugar, the cookies come out drier and taste dusty by day three. If you use only brown sugar, the dough becomes very sticky and clings to the spoons when shaping.
For extra caramel depth we like to use dark brown sugar (muscovado or whole cane sugar) rather than the lighter varieties from the supermarket shelf. The difference is clear in the finished cookie: dark brown sugar intensifies the chocolate profile, while light brown sugar runs alongside it without adding much.
Shape with teaspoons, not your hands
The dough is fairly soft. That is intentional, because the melted couverture makes the dough more fluid than a classic shortcrust. We therefore shape the cookies using two teaspoons, forming walnut-sized mounds on the baking tray with about 2 cm between them. Hands stay clean, and the cookies end up a consistent size. Dust once with icing sugar before baking, then bake on the middle shelf for 12 to 15 minutes at 180°C top and bottom heat.
If you prefer to cut the dough into shapes, chill it in the fridge for 1 hour first. It can then be rolled out thinly on a floured surface and cut with cookie cutters. For the classic mound version this is not necessary, and the dough can be used straight after mixing.
What can go wrong when baking
Cookies turn out too hard
Chocolate cookies often still look soft after 12 minutes. That is misleading, because the dark dough shows no visible browning. Our solution: We take the cookies out as soon as the surface looks set and gives slightly when pressed gently with a finger. They carry on cooking on the hot tray for another 2 to 3 minutes. If you wait until they are completely done on the tray, you will have hard, crunchy cookies the next day instead of soft ones.
Cookies spread flat
If the butter was too warm or we leave the dough standing in a warm kitchen, the mounds spread flat in the oven instead of holding their shape. Our solution: Chill the shaped tray in the fridge for 15 minutes before it goes into the oven. Cold dough holds its shape longer because the fat only starts to melt halfway through baking, giving the baking powder time to loosen the dough first.
Bitter aftertaste
80 g of unsweetened cocoa powder is a lot. If you use a cheaper variety, you may notice a sharp, slightly harsh bitterness. Our solution: Heavily de-fatted cocoa powder (10 to 12% fat) from a brand using the Dutch process tastes noticeably rounder. The Dutch process neutralises the acid in the cocoa and makes it more aromatic. The packaging usually says “alkalized” or “Dutch-process”.
Ways to vary the recipe
With macadamia nuts or chopped almonds. 50 g of roughly chopped macadamia nuts or almonds work very well. We fold them into the finished dough with the spatula at the end, not in the mixing bowl, otherwise they get chopped up.
With orange zest. Add the zest of one organic orange during mixing, and the cookies take on a chocolate orange flavour. Lemon zest also works, though it feels less festive.
With a teaspoon of instant espresso powder. Added with the dry ingredients, the espresso lifts the chocolate flavour without making the cookies taste of coffee. A mocha effect without a mocha note.
Milk chocolate instead of dark. This works, but makes the cookies noticeably sweeter. To balance that out, reduce the brown sugar to 130 g and keep the white sugar at 100 g.
What to serve with the cookies
Chocolate cookies call for a glass of warm milk or a strong hot chocolate. For a festive touch, pair them with homemade eggnog from the Thermomix® or with vanilla sugar on gingerbread. On a cookie plate, our classic shortcrust varieties sit particularly well alongside these dark chocolate pieces, as the lighter shortcrust cookies frame the dark chocolate bites visually and flavour-wise.
How long the cookies keep
Stored in an airtight tin in a cool, dark place, they stay soft for about 7 to 10 days. We place a sheet of baking paper between the layers so they do not stick together. A slice of apple in the tin keeps them moist for another two to three days, but it needs replacing every two days.
Also good with: Milk, coffee and vanilla ice cream.
Freezing works very well, though it is better to freeze the raw dough rather than the finished cookies. We shape the mounds on a tray, freeze them for 1 hour, then transfer them to freezer bags. When needed, place them frozen on the baking tray and extend the baking time by 2 to 3 minutes. They taste better freshly baked from frozen than thawed finished cookies, because the cocoa powder draws in a little moisture during thawing and the surface becomes slightly sticky.
If you are looking for more festive bakes, we have plenty of other cookie recipes and Christmas classics. Our walnut cookies add a light, nutty option to the biscuit tin, and our homemade vanilla sugar is a base ingredient for every baking recipe this season.