


We bake Besenbrot in a covered casserole dish at 240°C. The first 30 minutes with the lid on are not decoration, they are physics: the dough releases moisture, which condenses under the lid and falls back onto the crust as steam. This keeps the surface elastic until the bread has risen enough. Then the lid comes off, the crust dries out at 180°C and becomes crisp.
Besenbrot is not a complicated sourdough bread with days of fermentation. A sachet of dried sourdough provides the characteristic tang, and the yeast does the leavening. Rye flour type 1150 gives the bread its dark colour and slightly nutty flavour. The ratio is 400 g plain flour to 200 g rye flour. More rye would make the bread more compact, less rye would turn it into an ordinary mixed loaf.
Besenbrot (German Rye Bread) in the Thermomix®
Ingredients 0 / 8 ✓
- 1/2 cube fresh yeast
- 3 tsp salt
- 350 g water
- 400 g plain flour (type 405)
- 200 g rye flour (type 1150)
- 2 tbsp honey
- 1 tbsp vinegar
- 1 sachet dried sourdough
Instructions 0 / 5
-
1
Dissolve the yeast.
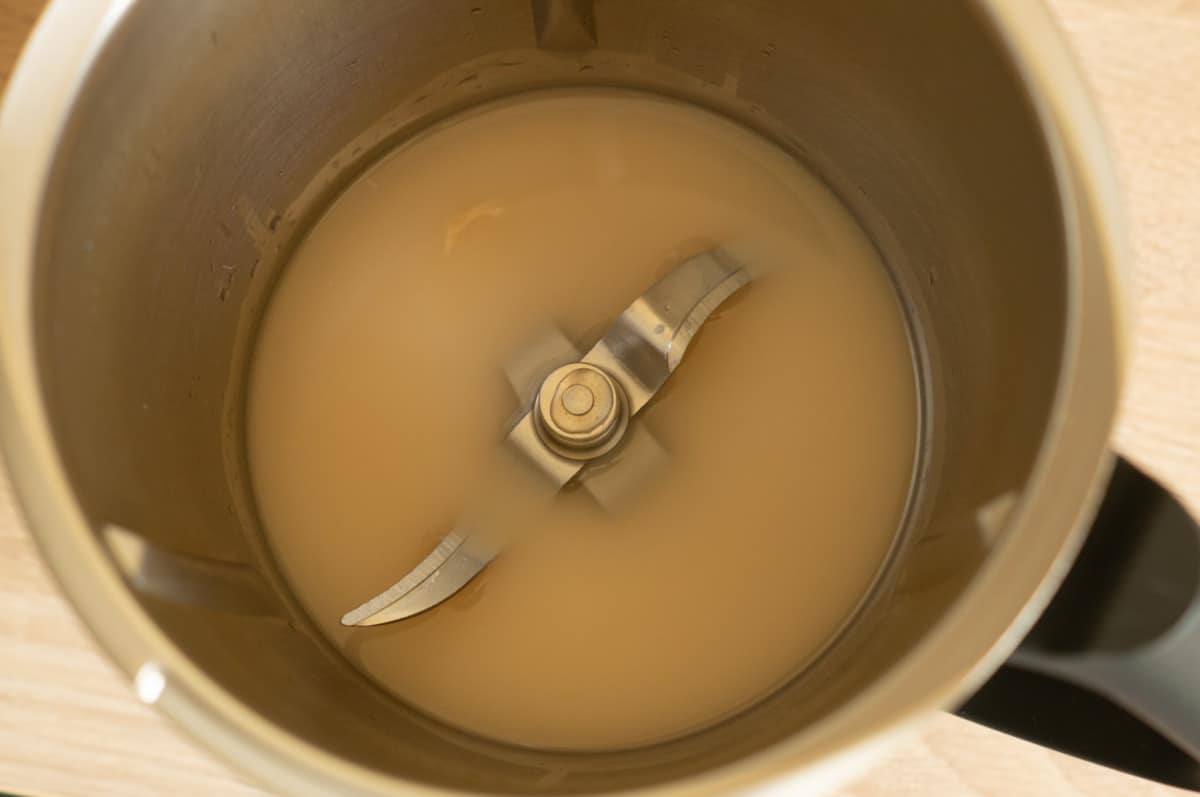
Place the yeast, salt and water into the mixing bowl and heat for 3 minutes / 37°C / speed 1.
-
2
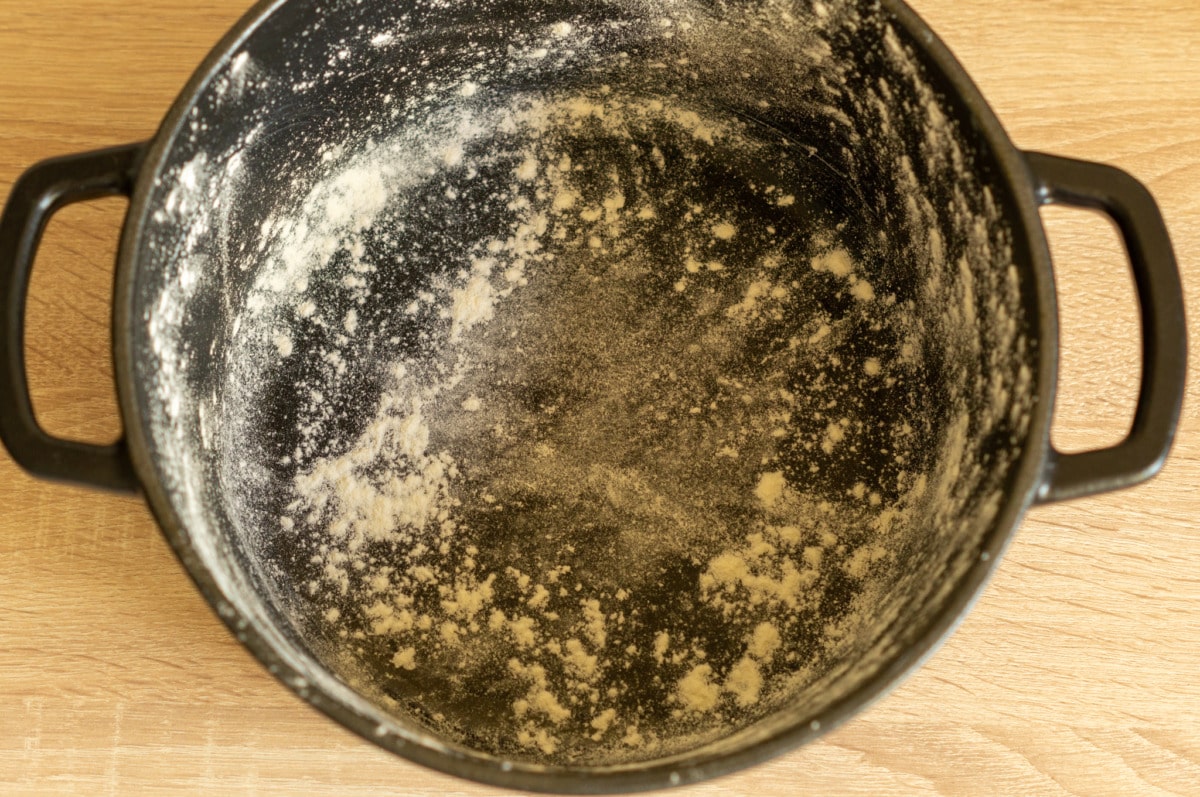
Grease and flour the casserole dish.
Meanwhile, grease and flour the casserole dish.
-
3
Mix the dough.
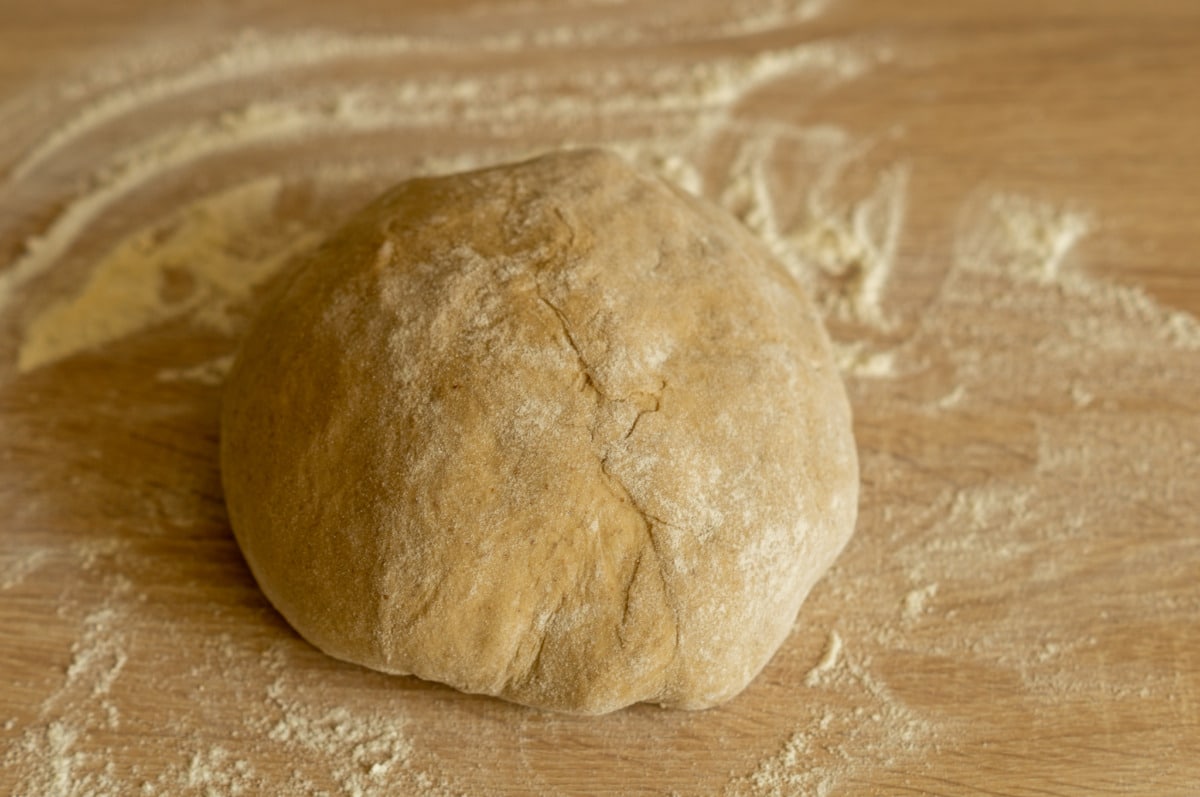
Add the flour, honey, vinegar and sourdough and knead for 5 minutes / kneading mode. Shape the dough into a loaf on a floured surface, place it in the casserole dish and cover with a damp tea towel. Leave to rise for 1 hour in a warm place.
-
4
Bake the bread.
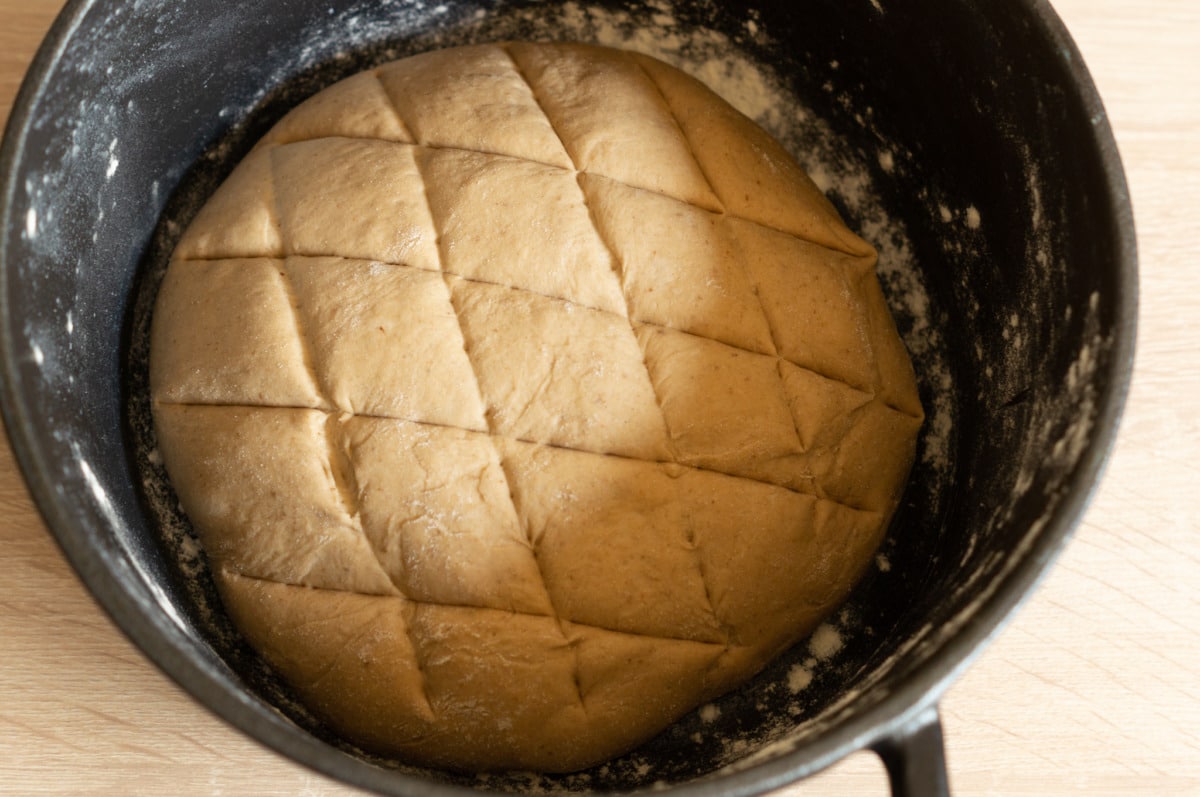
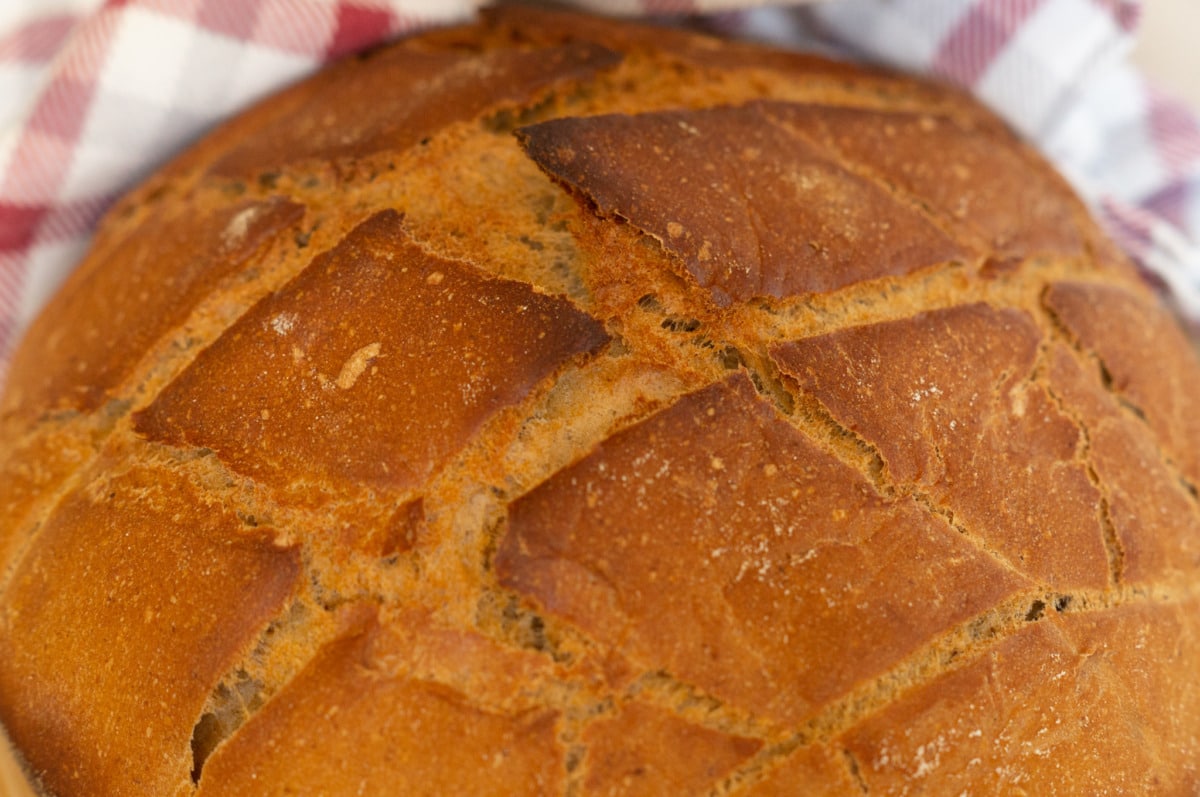
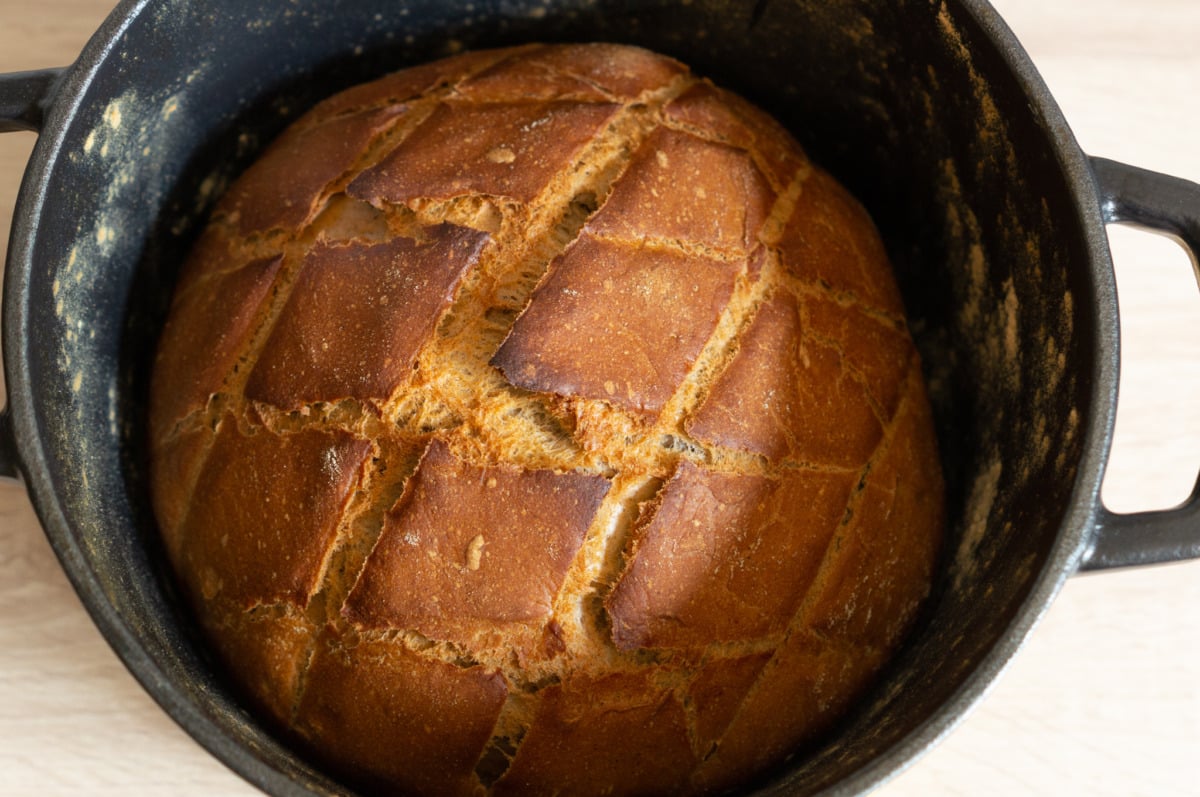
Preheat the oven to 240°C top and bottom heat. Score the bread in a diamond pattern, put the lid on the casserole dish and bake for 30 minutes.
Reduce the temperature to 180°C and bake for a further 30 minutes.
-
5
Serve the bread.
Remove the bread from the casserole dish and leave to cool before slicing.
Tip: Keep an eye on your Thermomix® during kneading so it does not walk off the worktop. Instead of honey, you can use the same amount of malt extract or malt beer.
Video
Nutrition per serving
Why 37°C for the yeast
The 3 minutes at 37°C on speed 1 dissolve the yeast completely in the water. This is the optimum activation temperature. Cooler takes longer, hotter kills the yeast cells. The Thermomix® holds the temperature precisely so you do not need to reach for a thermometer. After these 3 minutes the yeast is ready to work, the water is slightly cloudy and smells of fresh yeast.
Kneading mode and proving time
5 minutes on kneading mode develops the gluten in the plain flour. The dough becomes elastic and can rise later without tearing. Rye flour contains less gluten than plain flour, so the dough needs the full 5 minutes. Kneading for less time produces a dense bread with a coarse crumb.
The 1 hour proving time directly in the casserole dish saves a step. The dough rises in the same vessel it will be baked in. The damp tea towel stops the surface drying out and forming a skin. Without the cover the crust will crack during baking instead of staying smooth.
Scoring in a diamond pattern
The scores before baking are not decorative. They give the bread controlled breaking points. As the bread bakes it expands, and without scores it would burst open at its weakest spot. The diamond pattern ensures the bread rises evenly and does not bake lopsided.
Honey or malt extract
The honey feeds the yeast and gives the crust a darker colour during baking through caramelisation. You can also use malt extract or malt beer instead. The result is maltier in flavour and the crust will be just as dark. Without honey the bread will be paler and the flavour less rounded.
Vinegar in the bread dough
1 tbsp of vinegar makes the dough more stable. The acidity tightens the gluten network and helps the bread hold its shape during proving. It also reinforces the mild tang from the dried sourdough. You will not taste the vinegar as vinegar in the finished bread, but as the typical sourness of a good loaf.
Greasing and flouring the casserole dish
Greasing stops the dough sticking to the dish. Flouring on top of the fat ensures the bread slides out cleanly after baking without leaving crust on the base. If you only grease without flouring, the crust will still stick slightly.
Why 240°C, then 180°C
The first 30 minutes at 240°C with the lid on give the bread its oven spring. The high heat lets the yeast work one last time before it dies off above 50°C. The steam under the lid keeps the crust elastic. After 30 minutes the oven spring is finished and the bread has reached its final size. Now the lid comes off and the temperature drops to 180°C. The remaining 30 minutes dry out the crust and make it crisp.
Cooling before slicing
Straight from the oven the bread is still moist inside and the crumb is unstable. If you cut it now you will compress the loaf and the slices will be gummy. Leave it to cool on a rack for at least 30 minutes. The remaining moisture distributes evenly and the crumb firms up. Then the bread can be sliced cleanly.
Leftovers the next day
Besenbrot keeps for 3 to 4 days in a bread bin or wrapped in a tea towel. The crust softens after a day, which is normal for bread with a rye content. You can toast individual slices briefly to crisp up the crust again. Freezing works well: whole slices in a freezer bag keep for 2 months. To defrost, put them straight in the toaster or in the oven at 180°C for 10 minutes.
Besenbrot with spreads
The mild tang and nutty rye flavour pair well with savoury spreads. We serve Besenbrot with Obazda, date and curry dip, tomato and feta dip, homemade cream cheese and salmon spread.
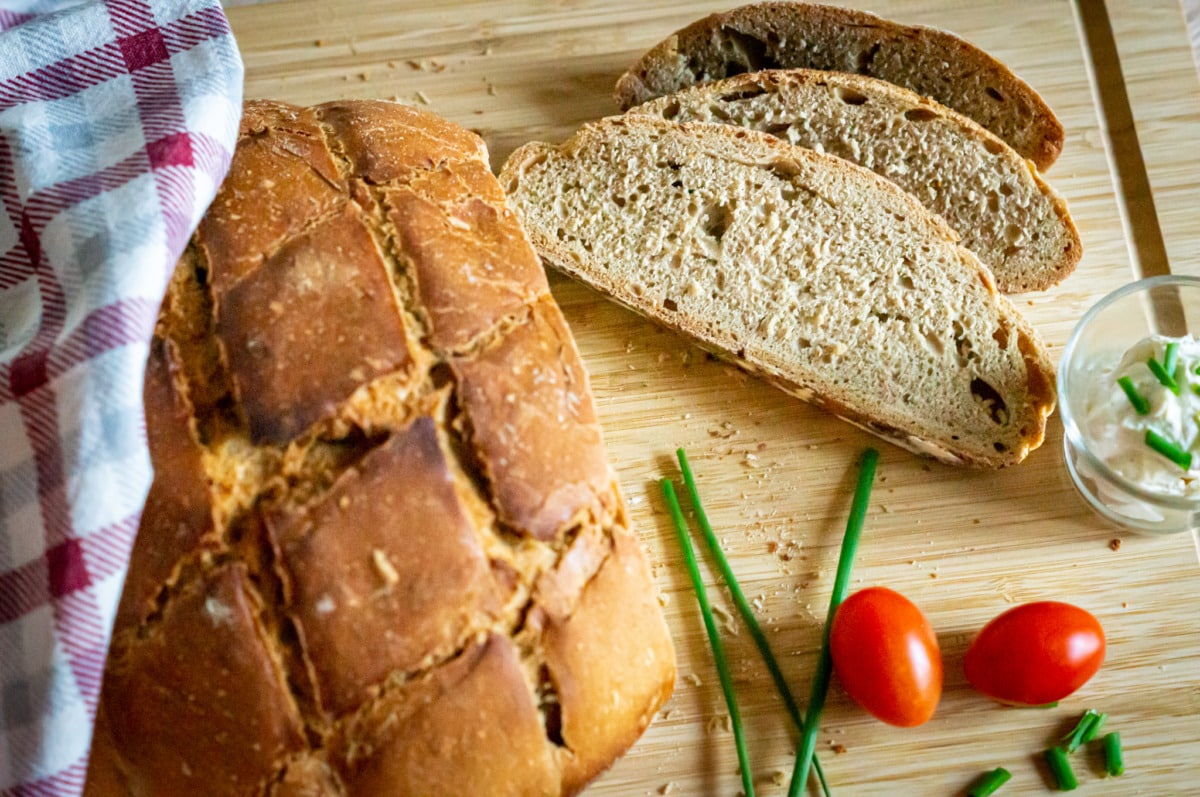
Also goes well with: butter, cheese and jam.

More bread recipes: White bread with buttermilk, Pull-apart rolls