


For campfire bread made in the Thermomix®, there are two routes: the baking powder version, which is kneaded in 5 minutes on kneading mode and can go straight onto the embers, and the yeast version, which needs just 3 minutes of kneading but then requires an hour to prove, giving a lighter, more flavourful result. Which one you choose comes down to one question: how much time do you have before the fire is glowing? If you are being spontaneous, knead 500 g flour, 60 g butter and 270 g milk with baking powder. If you are planning ahead, start the yeast dough with 450 g flour and 280 g warm water.
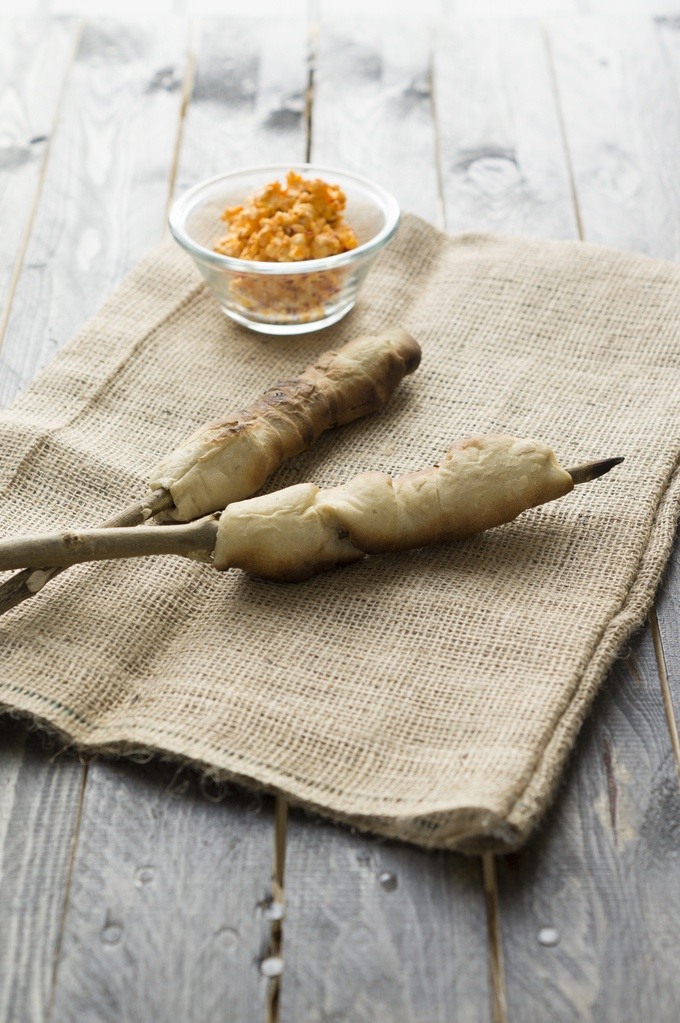
Both doughs are done in a single operation, with no bowl and no manual effort. The Thermomix® kneads the firm dough smooth in one go, which matters for campfire bread: it needs to be pliable and tear-resistant so it can be wrapped around the stick at the campfire without slipping off. We cover both versions, the most common mistakes at the embers, and how to make campfire bread in the oven without any fire at all. Our herb quark from the Thermomix® works brilliantly as a dip alongside it.
Quick Campfire Bread on a Stick, Thermomix®
Ingredients 0 / 7 ✓
- 500 g flour
- 1 1/2 tsp salt
- 1 tsp bread spice mix
- 1 sachet baking powder
- 60 g butter
- 270 g milk
- 2 tbsp mixed herbs (optional)
Instructions 0 / 3
-
1
Knead the dough.
Add all ingredients to the mixing bowl and knead for 5 minutes / kneading mode.
-
2
Divide the dough and chill.
Divide the dough into 10 equal pieces, wrap in cling film and keep chilled until ready to use.
-
3
Grill the campfire bread.
Cut sticks roughly 40 to 120 cm long (make sure they are not from poisonous trees; hazel is the best choice), stretch each piece of dough lengthways and wrap it around the stick. Place on the grill rack or hold over the embers. The bread is ready when it turns easily on the stick.
Video
Nutrition per serving
5-minute baking powder dough or 3 minutes of yeast plus proving time
The quick dough needs no resting time at all. All ingredients go straight into the mixing bowl: 500 g flour, 1 1/2 tsp salt, 1 tsp bread spice mix, 1 sachet baking powder, 60 g butter and 270 g milk. Then knead for 5 minutes on kneading mode. The dough is ready to portion straight away and makes 10 sticks at around 242 calories each. The bread spice mix is listed as optional in the recipe, but it makes a real difference: without it the flavour is flat, with it the campfire bread has a savoury character of its own. The 2 tbsp of mixed herbs are also optional and add a fresh note.
The yeast dough needs less kneading but more patience: crumble 1/2 cube of yeast into the mixing bowl, then add 450 g flour, 1 1/2 tsp salt, 1 tsp honey and 280 g warm water and knead for 3 minutes on kneading mode until smooth. Then cover and leave to prove at room temperature for one hour. This version is lighter at 164 calories per stick, airier, and naturally vegan because it contains no butter, milk or egg. Plan the proving time so the dough is ready when the embers are. Use that hour to lay the wood on the fire and let it burn down.
Both doughs can be prepared in advance. Portioned in cling film they keep in the fridge for several hours until the fire is ready. You can even leave the yeast dough to prove overnight in the fridge, then let it come up to room temperature briefly before shaping.
Where campfire bread really goes wrong at the fire
Burnt outside, raw dough inside
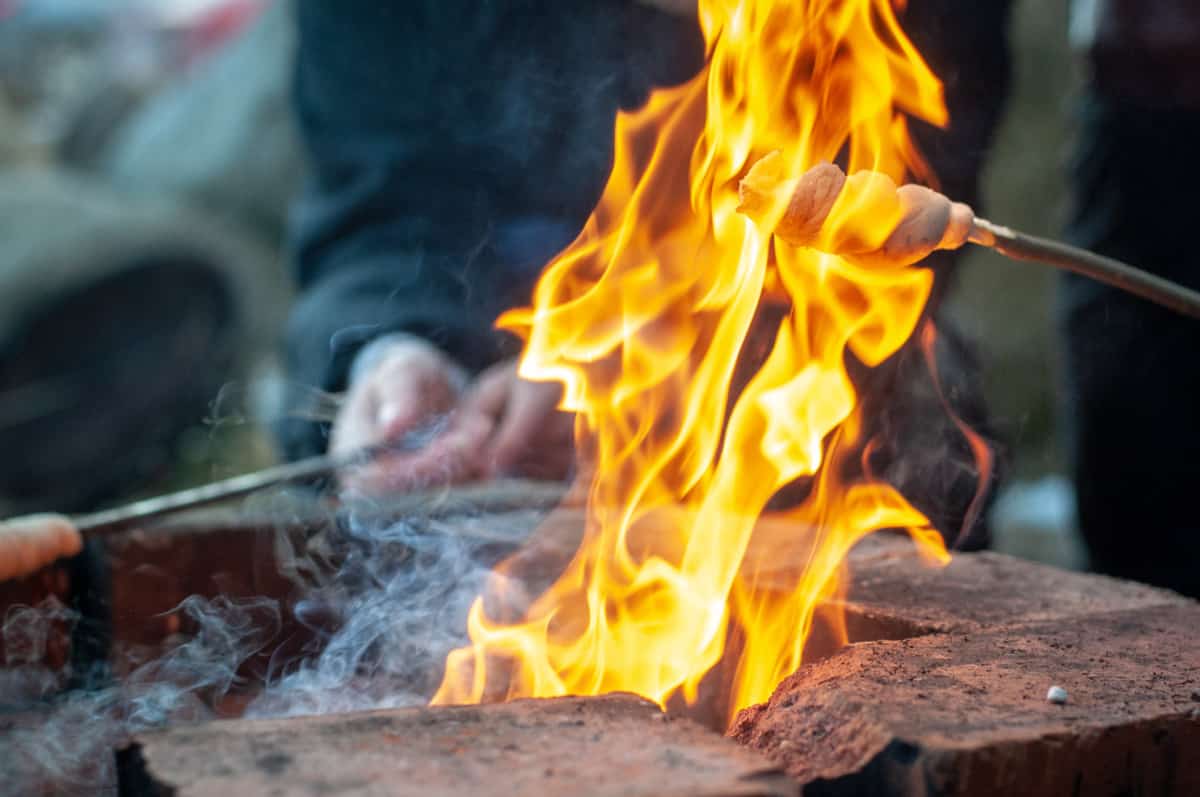
By far the most common mistake. Holding the dough in an open flame burns the crust within two minutes while the centre is still raw. Our solution: hold it over the embers only, never in the flame. Embers give an even radiant heat that cooks the bread through from the outside in. Allow about 20 to 25 minutes for the baking powder dough and 10 to 15 minutes for the yeast dough, turning constantly throughout.
The dough roll is wound too thick
A thick sausage of dough around the stick looks generous, but it will never cook through. The outside is done long before the heat reaches the centre. Our solution: shape each of the 10 pieces of dough into a flat roll about 15 cm long and no thicker than a thumb, then wrap it around the stick in an overlapping spiral and press gently. Wound thinly, the dough browns evenly and bakes all the way through.
Wrong wood for the stick
The stick is in direct contact with the dough and will transfer flavour, and in the worst case toxins too. Our solution: use hazel or willow sticks. They burn slowly, do not resin, and are safe to use. Avoid yew, birch, beech and elder (toxic or bitter) as well as conifers such as spruce and fir, which resin and burn through quickly. If you cannot find suitable branches, use clean long metal or telescopic skewers instead.
Pulled off the stick too early
As soon as the outside looks brown, everyone wants a bite. Our solution: wait until the bread turns by itself on the stick and starts to come away. That is the most reliable sign that the campfire bread is cooked through. If it sounds hollow when tapped, it is ready.
Sweet, savoury or fully vegan: variations on the dough
Sweet campfire bread for children: In the baking powder dough, reduce the salt to 1/2 tsp, leave out the bread spice mix and add 2 tbsp sugar plus 1 tsp vanilla sugar. Take care at the fire: sugar browns faster, so hold it a little further from the embers and turn more frequently.
Chocolate or marshmallow filling: After baking, fill the warm hollow inside the campfire bread (where the stick sat) with a piece of chocolate or a marshmallow. It melts in the residual heat. Kneading it directly into the dough also works, but it is more likely to burn.
Savoury with cheese and bacon: Knead 50 g grated cheese or finely diced bacon briefly into the dough after kneading (10 seconds on kneading mode is enough). Especially good with the savoury baking powder version.
Vegan: The yeast version is already vegan. For the quick dough, replace the 60 g butter with 50 g neutral oil and the 270 g milk with oat or soya drink, and the baking powder version works just as well as a fully plant-based dough.
Campfire bread without a fire: in the oven or on the barbecue
No campfire, bad weather or campfire bread in the middle of a city? Both doughs work in the oven too. Shape the portions into small rolls or wrap them around greased wooden spoon handles and bake at 200°C top and bottom heat for about 15 to 20 minutes until golden brown. On a gas barbecue at medium heat with the lid closed it takes a similar length of time.
If you regularly bake on a stick outdoors and do not want to hunt for suitable branches each time, a set of clean telescopic skewers is well worth having. They extend to stick length, are heat-resistant, and straight after the campfire bread they are ready for sausages or marshmallows.
Leftovers, preparation and storing the dough
Freshly baked campfire bread tastes best straight from the fire and dries out quickly when stored. Leftover pieces keep in a tin for about a day and can be refreshed the next day in the oven at 150°C for a few minutes to crisp the crust again. Unbaked dough keeps better: portioned in cling film, the baking powder dough keeps in the fridge for around a day, and the yeast dough keeps for up to two days thanks to slow cold proving. Let the yeast dough come up to room temperature briefly before shaping.
If you want to freeze the raw dough: portioned and well wrapped it keeps for about 3 months. Thaw overnight in the fridge, then use as if freshly made.
More breads and sides from the Thermomix®
For the yeast dough, our pizza dough kneading tips for the Thermomix® are a useful reference, as both require a smooth, elastic dough. Anyone who wants to go deeper will find the correct speeds and kneading times explained in our guide. And if you want to bake more: our bread collection for the Thermomix® brings together quick side breads, rolls and classic loaf recipes.
The most common questions about campfire bread
Goes well with: Goulash and herb butter.
Also worth a look: Besenbrot from the Thermomix®.