


We make this strawberry cake with the Thermomix® every year from mid-May onwards, when the local berries start appearing at farm shops. The trick that separates a “home baker’s cake” from “looks like it came from a patisserie” has nothing to do with the base and nothing to do with the cream. It is the way we arrange the strawberries.
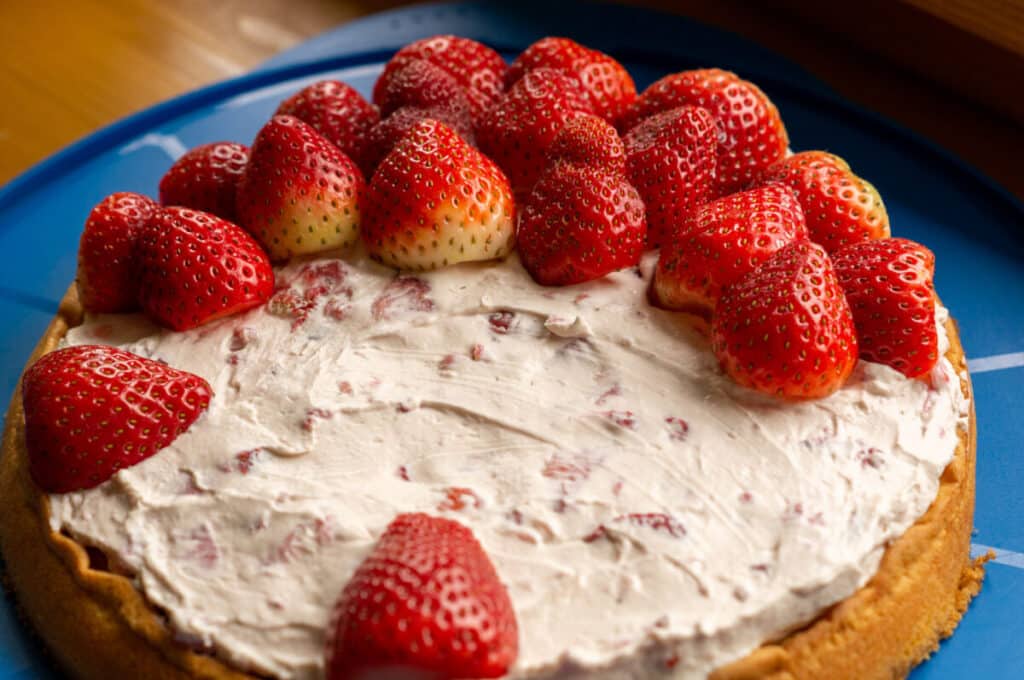
The halved strawberries go onto the cream with the pointed tip facing up, not cut side up. That sounds like a minor detail, but this is exactly where the result is decided. Tip facing up means the red cake glaze runs cleanly down the sloping sides and fills the gaps without flooding the berries. Cut side up means the glaze forms little puddles on the flat tops of the berries, overflows at the edges, and makes the finish look blotchy. We have compared both approaches enough times over the years to make it a house rule.
Strawberry Cake with the Thermomix®

Ingredients 0 / 14 ✓
- 5 g butter
- 3 eggs
- 100 g sugar
- 1 sachet vanilla sugar
- 80 g flour
- 1 tsp baking powder
- 1000 g strawberries
- 200 g double cream
- 1 sachet cream stabiliser
- 250 g Mascarpone
- 1 sachet vanilla sugar
- 1 sachet red cake glaze
- 250 g water
- 1 tbsp sugar
Instructions 0 / 9
-
1
Preheat the oven.
Preheat the oven to 180°C top and bottom heat and grease a springform tin with butter.
-
2
Whisk the eggs.
Insert the butterfly whisk, add eggs, sugar and vanilla sugar to the mixing bowl and whisk for 4 minutes / speed 4 until light and fluffy.
-
3
Mix the batter.
Add flour and baking powder and mix for 10 seconds / speed 4. Rinse the mixing bowl.
-
4
Bake.
Pour the batter into the prepared springform tin and bake on the middle shelf of the oven for 15 minutes. Test with a skewer.
-
5
Prepare the strawberries.
Wash and hull the strawberries. Cut 300 g of them into small pieces and halve the rest.
-
6
Whip the cream.
Insert the butterfly whisk into the mixing bowl, add double cream and cream stabiliser and whip on speed 3.5, watching carefully, until the cream is firm. Set aside. Optionally transfer some cream to a piping bag for decorating the cake later.
-
7
Make the strawberry cream.
Remove the butterfly whisk. Add Mascarpone, vanilla sugar and strawberry pieces to the mixing bowl and mix for 10 seconds / reverse direction / speed 3. Fold in the cream with the spatula.
-
8
Assemble.
Spread the cream over the cooled base and arrange the remaining strawberries on top.
-
9
Glaze.
Prepare the cake glaze according to the packet instructions and pour it over the strawberry cake. Leave the cake to cool fully before slicing.
Tip: Garnish your cake with chopped white chocolate, chopped almonds or mint leaves.
Nutrition per serving
Why this strawberry cake works
The thin sponge base carries 1 kg of berries. We bake the base deliberately flat (80 g flour, 3 eggs, 100 g sugar) and for only 15 minutes at 180 °C (top and bottom heat). A thick base soaks up moisture from the cream and collapses under the weight of the berries. A thin, fully baked base stays firm, even when 1,000 g of strawberries and 250 g of mascarpone cream land on top.
The mascarpone and cream layer solves the juice problem. Anyone who has made a strawberry cake without a cream layer will know the issue: the berries release juice, the juice meets the base directly, and the base goes soggy. We slide a 450 g layer of mascarpone, whipped double cream, and 300 g of finely chopped strawberries in between. The cream absorbs some of the juice and the base stays dry.
In the Thermomix® the base and the topping run in parallel. While the sponge is in the oven for 15 minutes, we whip the double cream in the clean mixing bowl on speed 3.5, watching carefully until it is firm, then set it aside. Next we mix mascarpone, vanilla sugar, and small strawberry pieces for 10 seconds on reverse direction / speed 3, then fold in the cream with the spatula. The cream is ready before the base comes out of the oven.
The topping geometry in detail
From 1 kg of strawberries, 300 g are cut into small pieces and go into the cream. We halve the remaining 700 g lengthways. Halving lengthways means one cut from stalk to tip, running the length of the berry. Not crossways, which gives two discs with two flat sides that wobble. Halved lengthways, each half has a flat cut side (which goes face down into the cream) and a rounded back with a tip (which faces up).
We place the halves close together, starting at the edge of the tin and working inward in concentric circles. Each berry supports the next. The gaps between the berries are kept deliberately small, as the glaze fills only those gaps and does not pool on top of the berries.
Applying the cake glaze correctly
The glaze is the second point where this cake can go wrong. Hot glaze poured straight from the hob onto the berries causes two problems: it turns cloudy as it cools because the starch sets too quickly, and it half-cooks the surface of the strawberries, making them mushy.
Our solution: bring the cake glaze to the boil according to the packet instructions with 250 g of water and 1 tbsp of sugar, then take it off the heat and leave it to rest for 4 to 5 minutes until it has cooled to room temperature. Only then spoon it in a circular motion over the berries. When applying, the glaze should be thick and syrupy. If it starts forming threads as you pour, it is too cold and we warm it up again in the mixing bowl for 10 seconds at 50 °C / speed 1.
When the strawberry cake goes watery or the glaze turns cloudy
Watery base after 4 hours in the fridge
This happens when the strawberries are washed but not patted dry before being arranged. Residual water on the skin plus juice from the cut surfaces combines with the glaze and breaks through the cream to the base. Our solution: Wash the strawberries, lay them briefly on a clean tea towel, and pat dry with a second towel before hulling and halving them. You can also brush the base thinly with a little apricot jam before adding the cream, which seals it.
Glaze runs out at the edge of the springform tin
The glaze will always find the path of least resistance, and that is the gap between the base and the rim of the springform tin. Our solution: Keep the springform ring on until the glaze has set completely, then remove it after 30 minutes in the fridge once the glaze is fully gelled. Do not spread the berry cream right to the edge either. Leave a 5 mm gap so that the outer row of berry halves forms a wall against which the glaze can rest.
Base is not fully baked in the centre
15 minutes is enough for a 26 cm springform tin with exactly 80 g of flour. If you increase the amount of flour or use a smaller tin, you get a thicker base that stays sticky in the middle. Our solution: The skewer test is essential. Insert a wooden skewer into the centre. If it comes out clean, the base is done. If not, bake for a further 3 minutes and test again.
Variations we actually make
With a pistachio topping: Once the glaze has set, we scatter 30 g of roughly chopped unsalted pistachios around the edge. This adds a green accent colour and a crunchy contrast to the soft cream.
Strawberry and rhubarb in the glaze: Instead of water, we bring the cake glaze to the boil with 250 g of home-cooked rhubarb juice. The glaze becomes slightly tart and fits the season perfectly from mid-April through to early June. It works just as well as a flavour combination in a strawberry and rhubarb tray bake.
With limoncello in the cream: Use 20 g of limoncello instead of a sachet of vanilla sugar in the mascarpone cream. Most of the alcohol evaporates in the fridge, but the citrus note remains. It makes the cake feel more grown-up and cuts through the sweetness of the berries.
Without cream stabiliser: If you want to skip the cream stabiliser, add an extra 50 g of mascarpone to the mixing bowl along with the double cream before whipping on speed 3.5. The mascarpone stabilises the cream just as reliably.
Cream, vanilla ice cream, or a glass of strawberry lemonade
When the weather cooperates, we serve the strawberry cake alongside a strawberry lemonade on the terrace. Anyone who wants to bake without an oven will find the summer version with a biscuit base in our no-bake strawberry cheesecake. For glass desserts instead of cake, we recommend our strawberry and mascarpone dessert, which uses the same mascarpone and cream logic in a smaller format.
1 day in the fridge, best eaten on the day it is baked
In the fridge: The cake keeps for 2 days, covered with a cake dome. From day 3 onwards, the base softens and the berries start to release juice that melts the glaze. If you want to bake the cake a day ahead (the classic birthday scenario), that works perfectly well. The base, cream, and berry topping hold for 24 hours without any loss of quality.
Freezing: This does not work. We have tried it twice. Thawing makes the berries mushy, the glaze draws water as it thaws, and the cream separates. If you want to get ahead, freeze only the plain sponge base and make the topping and glaze fresh on the day you serve it.
Using up leftovers: Leftover slices taste almost better the next day, because the cream has taken on the flavour of the berries. We have them cold with a coffee in the morning rather than throwing them away.
What sets our strawberry cake apart from the standard recipe
Most Thermomix® strawberry cake recipes use a shop-bought sponge flan base or a heavy sponge batter topped with a red cream cheese mixture. Both work, but both have two weaknesses: the shop-bought base has no flavour, and the heavier sponge goes soggy under 1 kg of berries. Our approach addresses both points. Instead of a shop-bought base, we bake our own thin sponge with just 80 g of flour that still holds 1,000 g of berries plus 450 g of mascarpone cream. Instead of a standard cream, we place a mascarpone and double cream layer with 300 g of finely chopped strawberries between the base and the topping, acting as a moisture barrier. And the real difference lies in the berry geometry: tip facing up, halved lengthways, placed close together. That is what turns a home-baked cake into the patisserie finish our readers have been sending us photos of since 2021.
As an Amazon Associate we earn from qualifying purchases.
As an Amazon Associate we earn from qualifying purchases.
Also goes well with: vanilla sauce and icing sugar.
Looking for more berry recipes? Here are some to try:
- Strawberry and Rhubarb Tray Bake
- Thermomix® Strawberry Ice Cream
- Strawberry, Mango and Prosecco
- Strawberry Daiquiri
- Mixed Berry Bowl