


5 eggs, 150 g sugar, 150 g flour, half a sachet of baking powder and 30 minutes. This sponge base is the go-to recipe for strawberry tarts, Black Forest gateau, fruit cake and almost any other layered cake. The Thermomix® takes care of the whisking with the butterfly whisk, and that is exactly where it has the edge over a hand mixer.
Sponge Cake Base (Basic Recipe) Thermomix®

Ingredients 0 / 7 ✓
- 10 g butter
- 5 eggs
- 2 tbsp water hot
- 150 g sugar
- 1 sachet vanilla sugar
- 150 g flour
- 1/2 sachet baking powder
Instructions 0 / 5
-
1
Preheat the oven.
Preheat the oven to 180°C top/bottom heat (fan-assisted 160°C).
-
2
Grease the tin.
Grease a 26 cm springform tin with butter (or baking release spray).
-
3
Whisk the eggs.
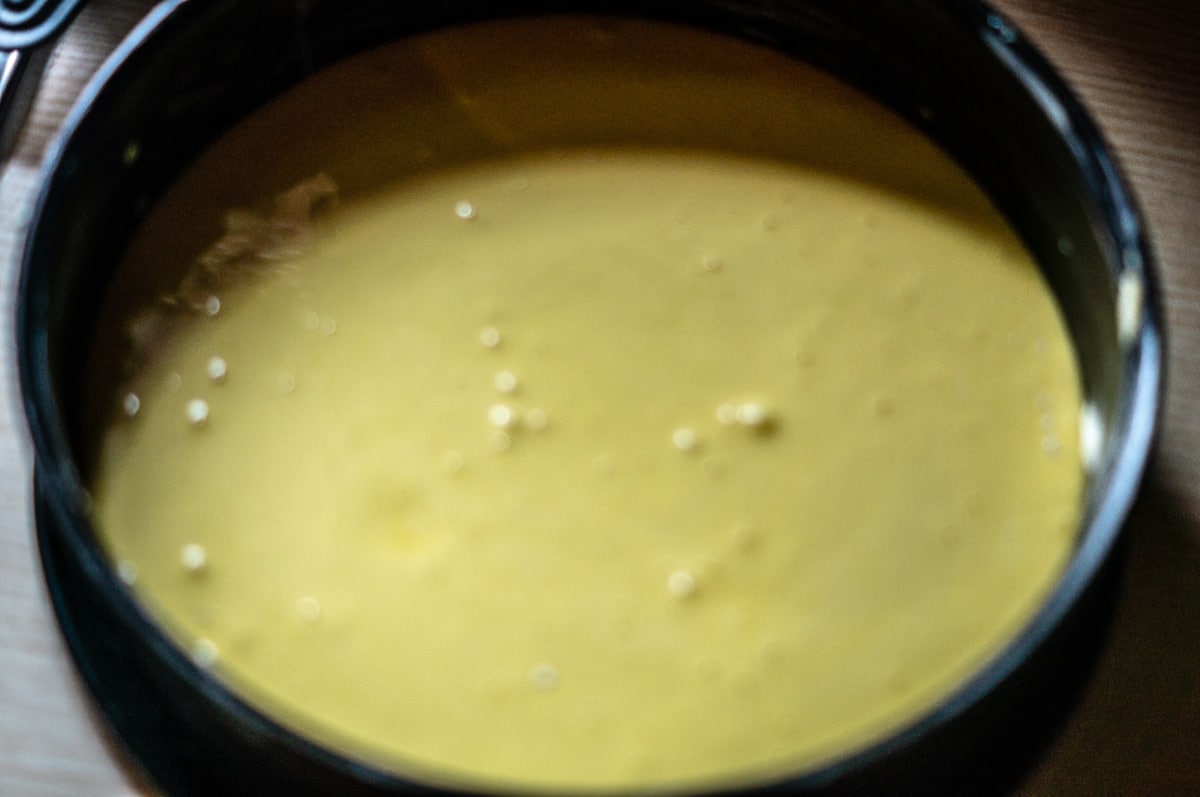
Insert the butterfly whisk into the mixing bowl. Add the eggs and hot water to the mixing bowl and mix for 5 minutes / speed 4. While mixing, gradually pour in the sugar and vanilla sugar through the mixing bowl lid.
-
4
Mix the batter.
Add the flour and baking powder to the mixing bowl and mix for 10 seconds / speed 3.
-
5
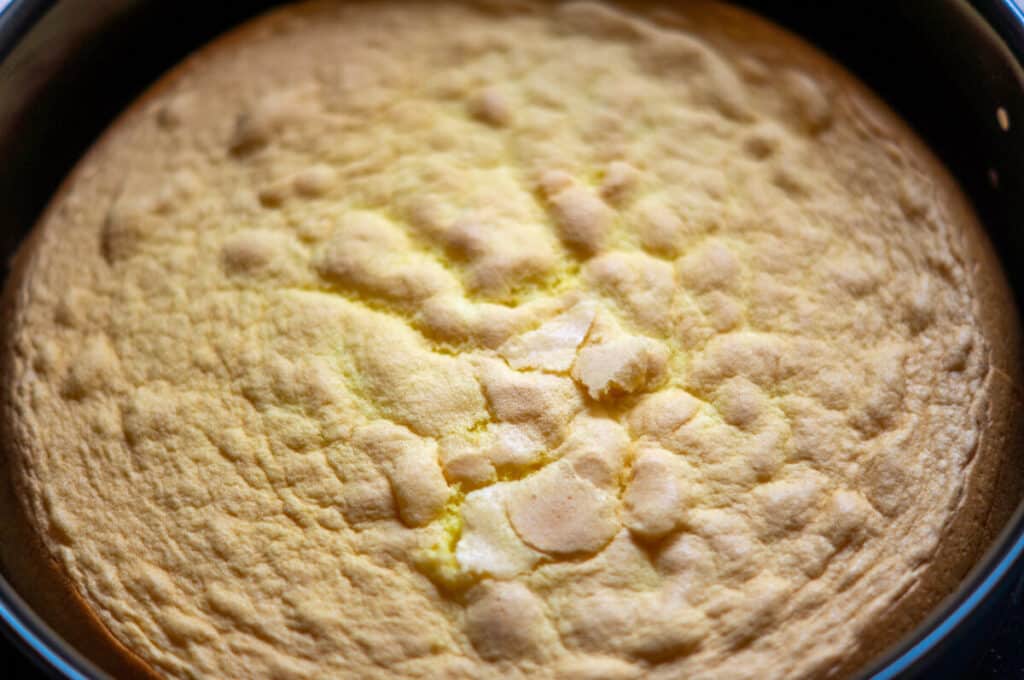
Bake the cake base.
Pour the batter into the greased springform tin and bake on the middle rack of the oven for 20 minutes. Watch that the base does not brown too much; cover with baking paper if needed. Test with a skewer to check whether the cake base is done.
Tip: Depending on your needs, the cake base can be cut horizontally to yield 2 or 3 layers.
Nutrition per serving
Why the butterfly whisk makes all the difference
Sponge lives on air. The 5 eggs must be whipped with the 2 tbsp of hot water until a stable, creamy foam forms. In the Thermomix®, this is done using the butterfly whisk: 5 minutes at speed 4, while the 150 g of sugar and the vanilla sugar are slowly poured in through the lid. The mixture doubles in volume.
Without the butterfly whisk it simply does not work. Speed 4 with the standard blade would chop the egg mixture rather than whisk it. The butterfly whisk works like a hand whisk, beating air into the eggs until they are pale yellow and thick with foam.
Folding in the flour: 10 seconds at speed 3, no more
The most critical moment with sponge: the 150 g of flour and the half sachet of baking powder go into the mixing bowl and are mixed for just 10 seconds at speed 3. Anyone who runs it for 20 seconds or bumps it up to speed 5 will knock out all the air we just spent 5 minutes whisking in. The result would be a flat, dense base instead of a light sponge.
Stop after 10 seconds, open the lid and check with the spatula. If you can still see pockets of flour, fold them in by hand with the spatula. That is gentler than running the motor again.
The three most common sponge base mistakes
Opening the oven too early: The sponge rises during the first 15 minutes. Opening the oven door during this time lets in cold air. The base collapses and will not rise again. Only open the oven after 20 minutes, and even then only briefly for the skewer test.
Cold eggs: Eggs straight from the fridge are harder to whisk. The volume stays lower and the base turns out denser. Take the eggs out 30 minutes beforehand. Room temperature makes a noticeable difference.
Too much flour: 150 g is exact. If you measure the flour by cup rather than weight, you can easily end up with 180 g or more. That makes the sponge dry and heavy. Simply use the Thermomix® to weigh it: place the mixing bowl on the scales, tare it, then pour in the flour.
Cutting the cake base into layers
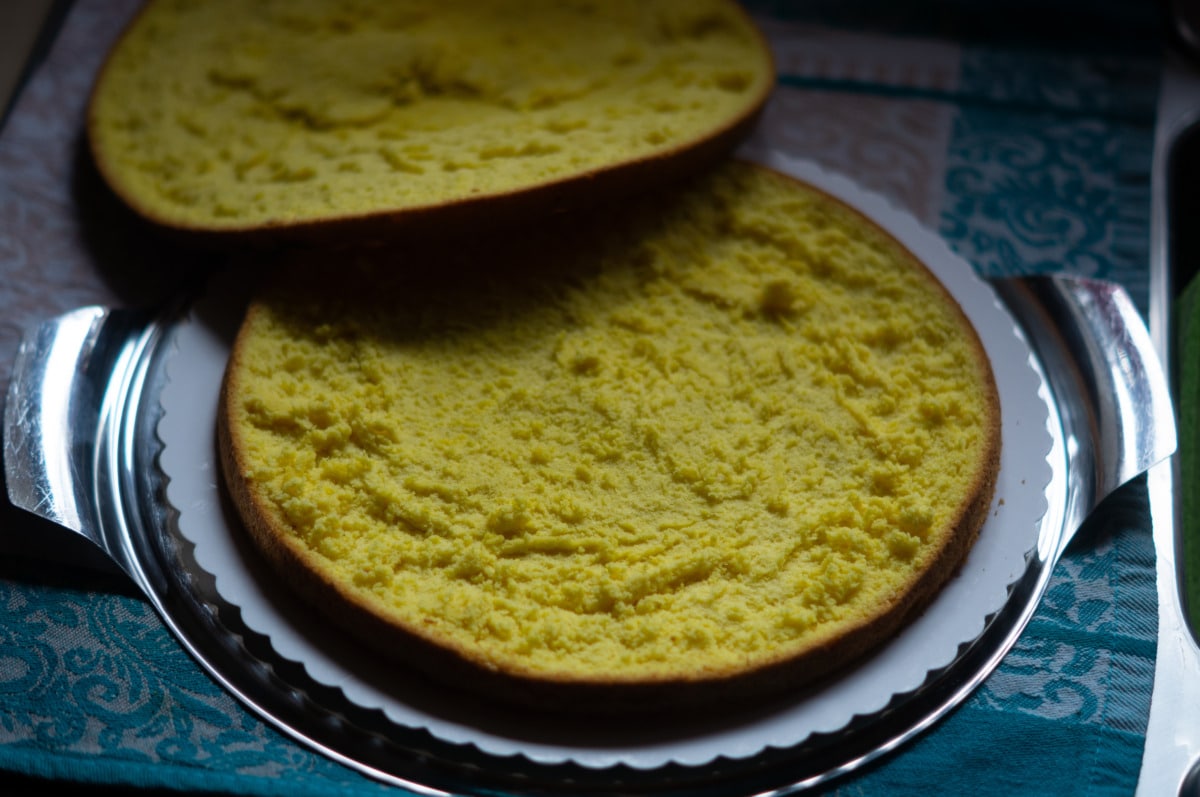
For a layer cake the base needs to be divided into 2 or 3 layers. Let the sponge cool completely first, for at least 2 hours. A warm base crumbles when cut.
A long bread knife with a serrated edge works best. Score a shallow groove all the way around at the desired height, then saw through slowly. If you are unsure, insert cocktail sticks at the same height all around and use the knife to follow them as a guide.
Chocolate, nut or citrus: three variations
Chocolate sponge: Replace 20 g of the flour with cocoa powder. The total quantity stays at 150 g (130 g flour and 20 g cocoa). Great for Black Forest gateau or chocolate layer cakes.
Nut sponge: Replace 50 g of the flour with ground almonds or hazelnuts. The base becomes slightly firmer and nuttier, and holds up better as a foundation for heavy creams.
Citrus sponge: Add the zest of an unwaxed lemon or orange to the sugar. The essential oils from the zest give the sponge a fresh note. 1 tsp of vanilla extract enhances the flavour further.
Storing and freezing
Wrapped in cling film, the finished sponge base keeps for 1 day at room temperature or 2 to 3 days in the fridge. Freezing works well: lay it flat in a freezer bag, press out the air, and it will keep for up to 3 months. To defrost, leave it in the fridge overnight.
We use this sponge base for our strawberry cake, our Fanta cake and our crustless cheesecake, among others. Our paradise cream cake is also based on this recipe.
Why does my sponge collapse?
Almost always because the oven door was opened too early or the flour was mixed in for too long. The air we whisked in over 5 minutes at speed 4 escapes when there are temperature fluctuations or when you overmix. The second cause: too little baking powder. Half a sachet is required, not less.
Can I bake the sponge with spelt flour?
Yes, spelt flour type 630 works as a 1:1 replacement. The sponge will be very slightly nuttier in taste and a little firmer in texture. The quantities and Thermomix® timings remain identical.
Goes well with: fresh fruit and chocolate glaze.